Coming soon!
Note for Beth and Jenny: be sure to cover the following
- how to access
- statuses
- form navigation (tabs, instructions, labels)
- validations
- save, but not marked complete
- attachments
- raw data report
- view PDFs
- validate/submit
- view report after submitting (read-only)
- change request/resubmit
How to Access FORHP - PIMS | |
|---|---|
From the EHBs login page, enter your Username and Password. Click the Login button, which navigates you to the Home page. |
|
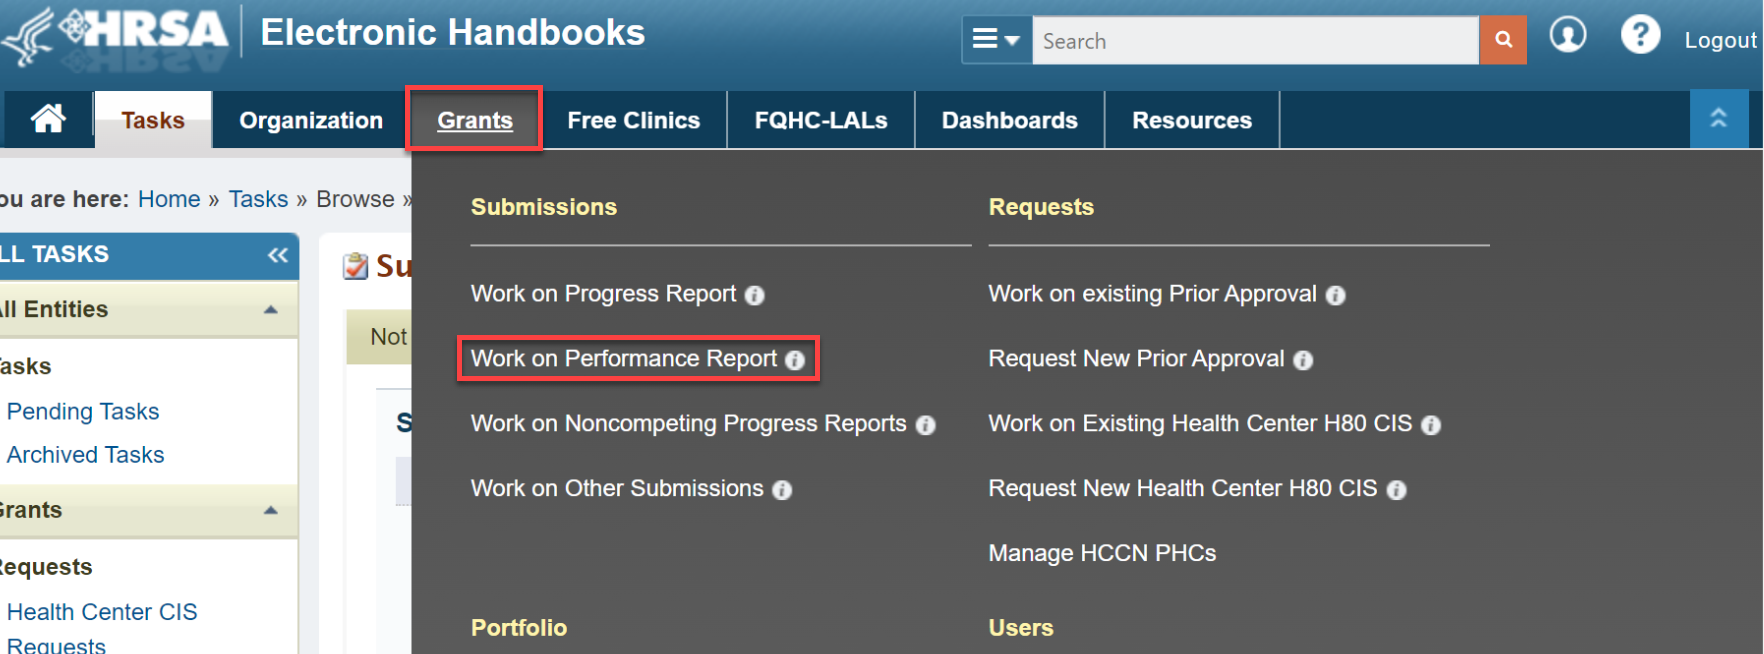
Locate the Grants Tab on the top navigation bar. Hover over the Grants Tab and click on Work on Performance Report. |
|
You will land on the Submissions-All page. Scroll down to the report list, find your report, and in the Options column click on the Start or Edit button. |
|
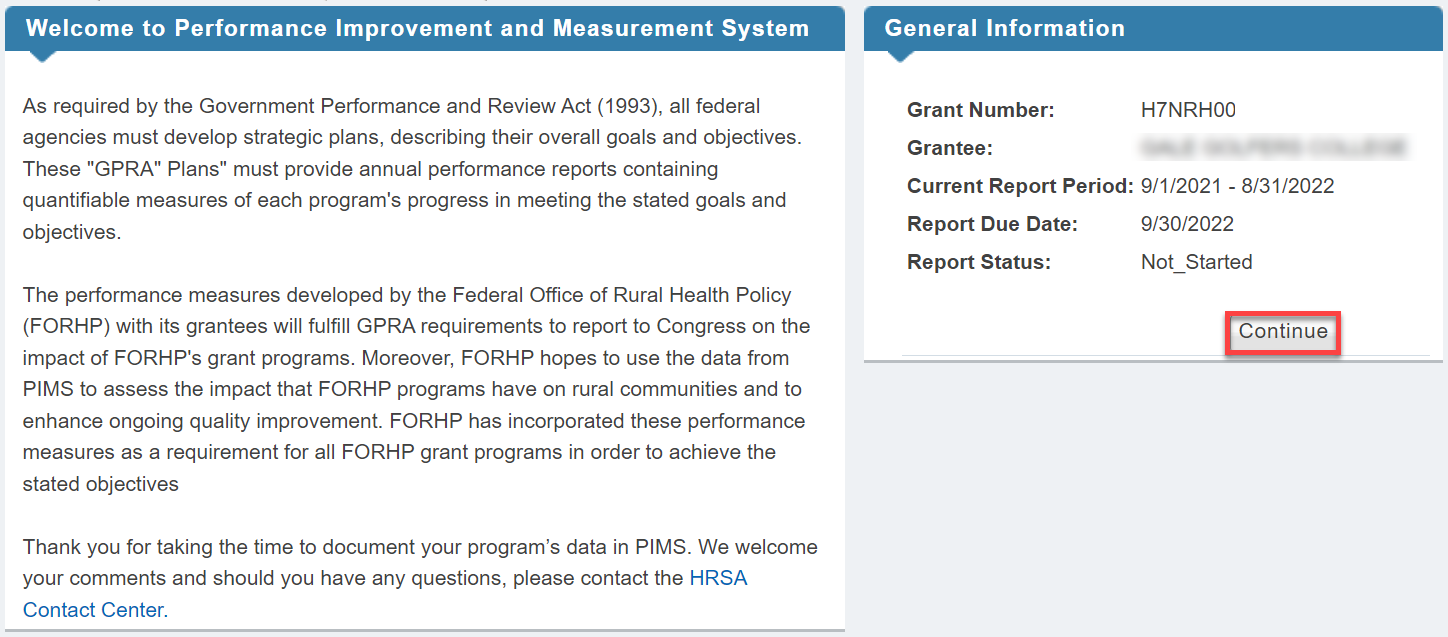
This brings you to the Welcome to the Performance Improvement and Measurement (PIMS) pop-up page. Click on the Continue button. |
|
Form Navigation | |
You will land on the Service Area and Consortium Report page, as indicated on the left Navigation bar. A) Use the left Navigation bar to select each form to work on and view reports, work flow, and PDFs. B) The center of the page you can view your grant information and complete the forms. |
|
When filling out the form, fill in all white boxes. Grayed out boxes do not need to be filled out. DO WE NEED TO ADD even if ZERO??? |
|
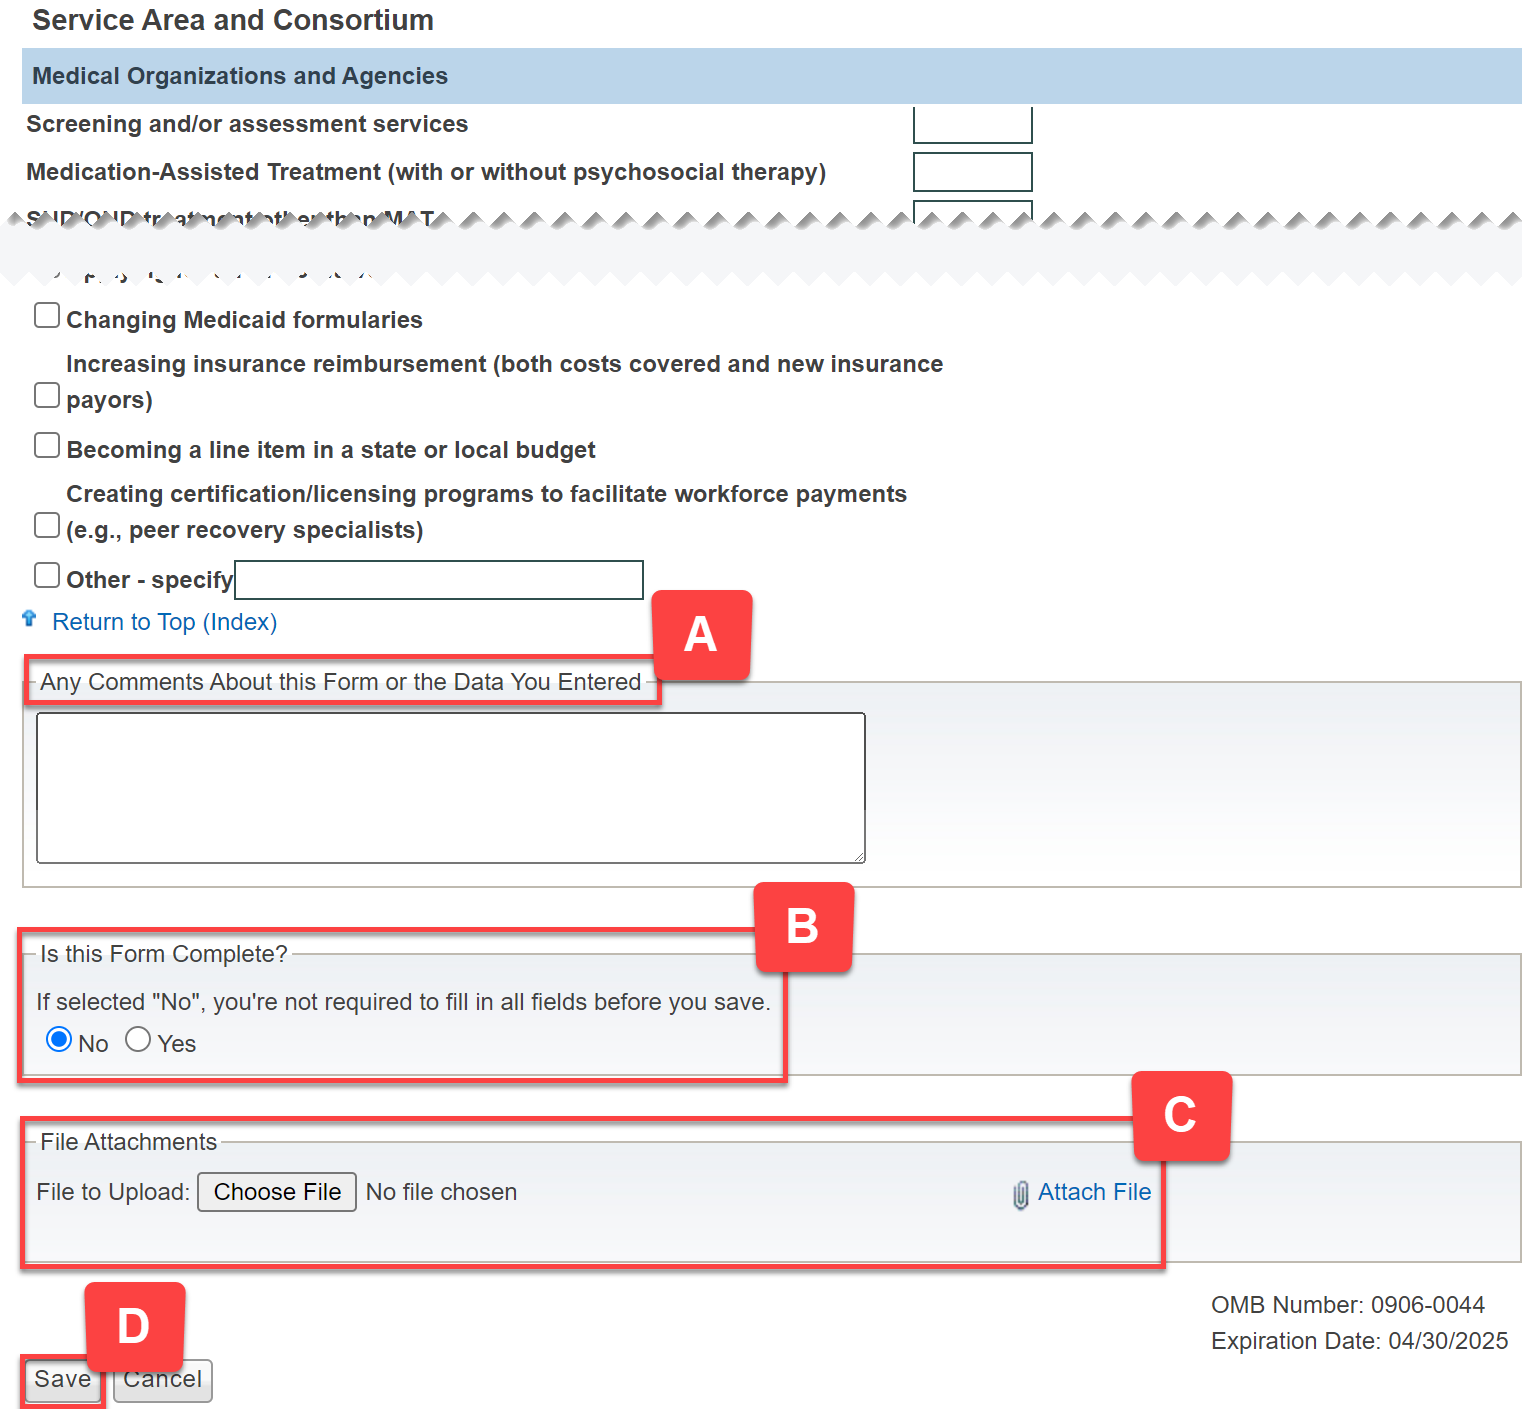
Make sure to view and/or complete the following: A) Comments B) select Form Complete No or Yes button C) File Attachments D) select Save button |
|
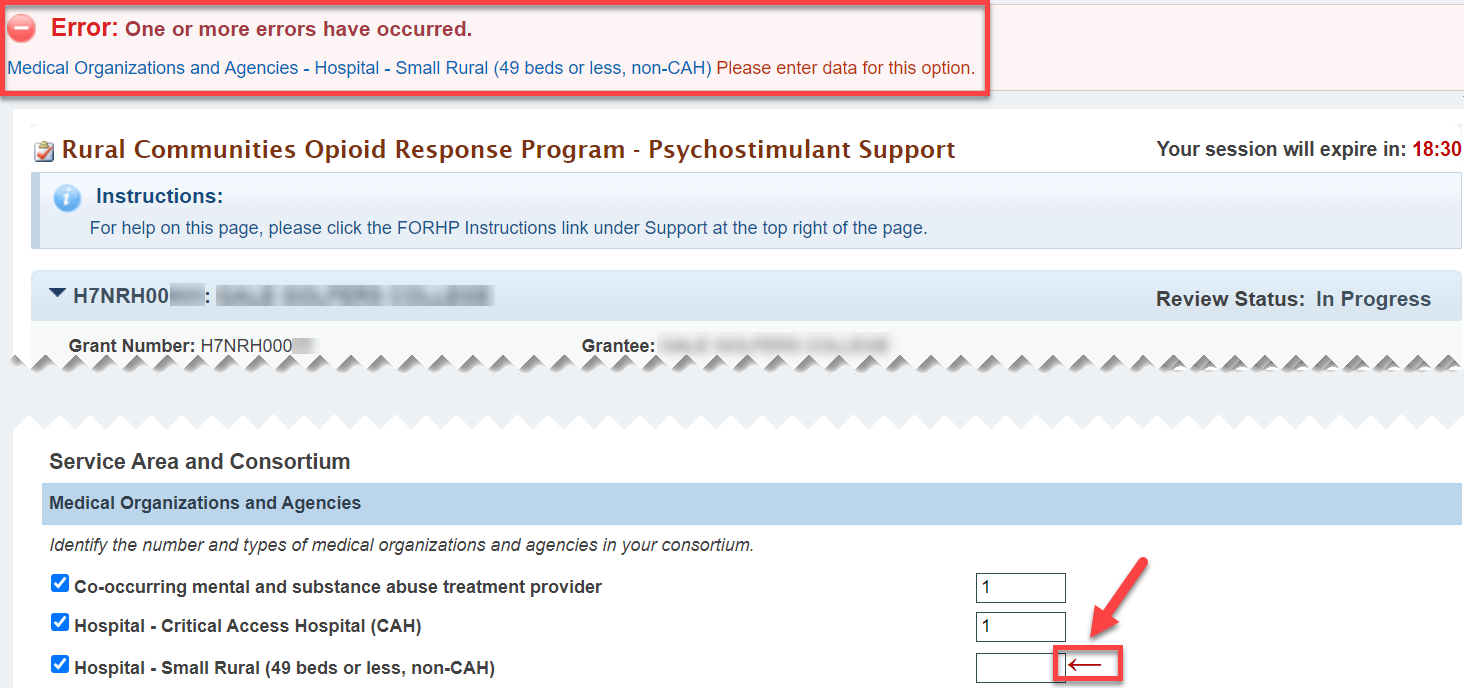
After clicking Save, you may see a Validation Error Message and indicator arrow. For every box you check you must fill in a number. If not, you will have have a Validation Error message. |
|
Select No or Yes for Form Complete. Click on the Save button. |
|
If NO was selected you will see: A) Edit symbol in the left Navigation bar B) Review Status will show In Progress |
|
If Yes was selected you will see: A) Green check mark in the left Navigation bar B) Review Status will show In Progress. |
|
Forms may be in different statuses as you work through them. |
|
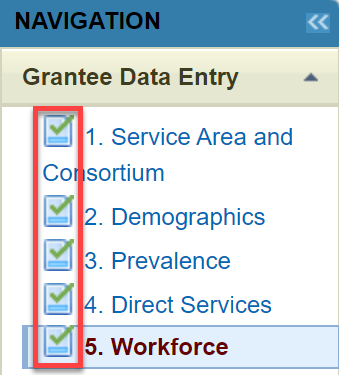
Once you have completed all forms you will see a green check mark next each form title. |
|
Left Navigation Bar or Navigating Your Application or How to Navigate Your Application | |
Reports | |
|---|---|
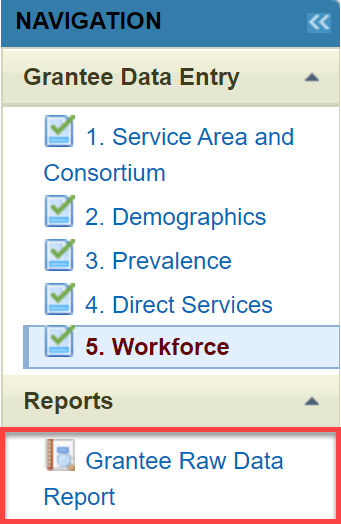
| In the Reports section, click on Grantee Raw Data Report. |
|
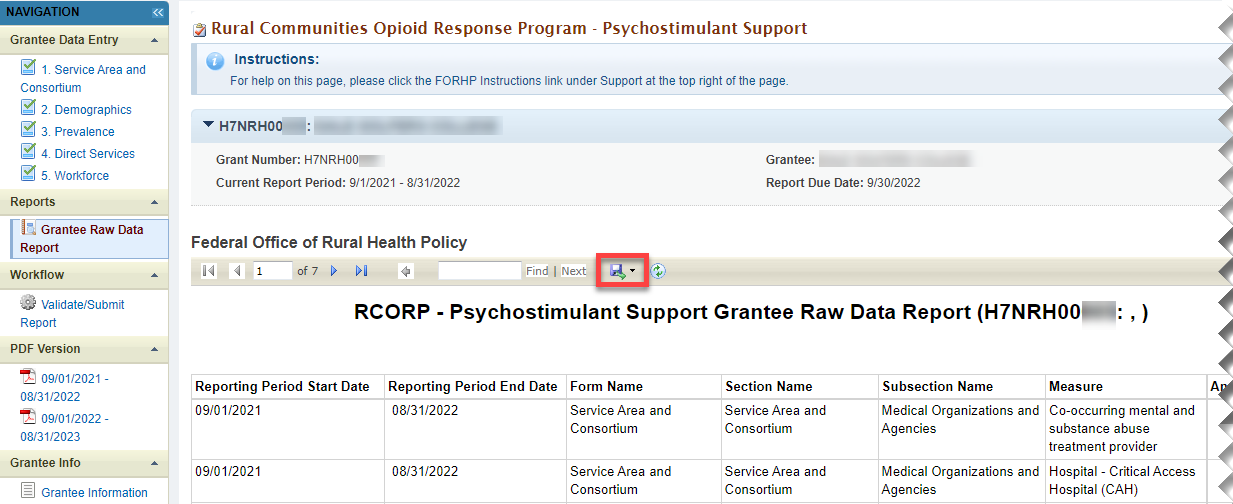
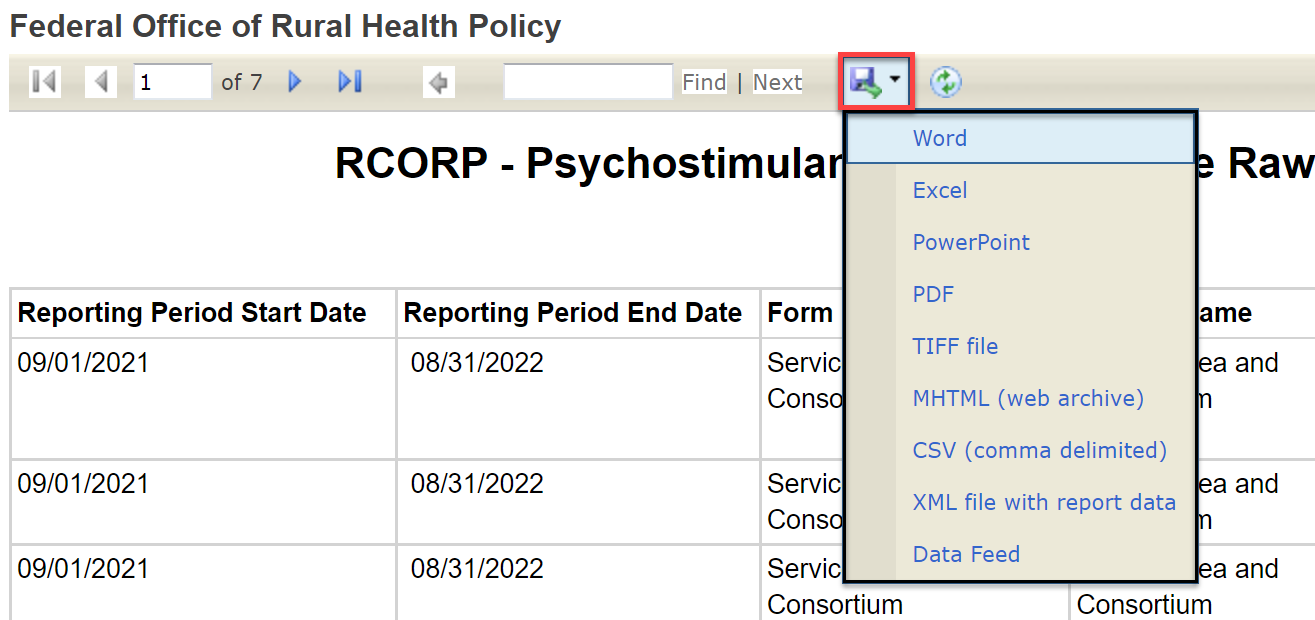
You have landed on the Grantee Raw Data Report. Click on ????? to view the drop-down to view the export options menu. |
|
| Select an export option to export your data. |
|
Workflow | |
|---|---|
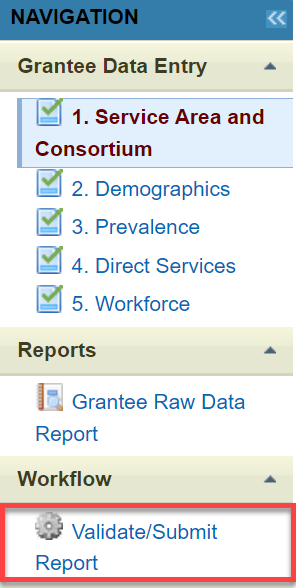
In the Workflow section click on Validate/Submit Report to submit your report. |
|
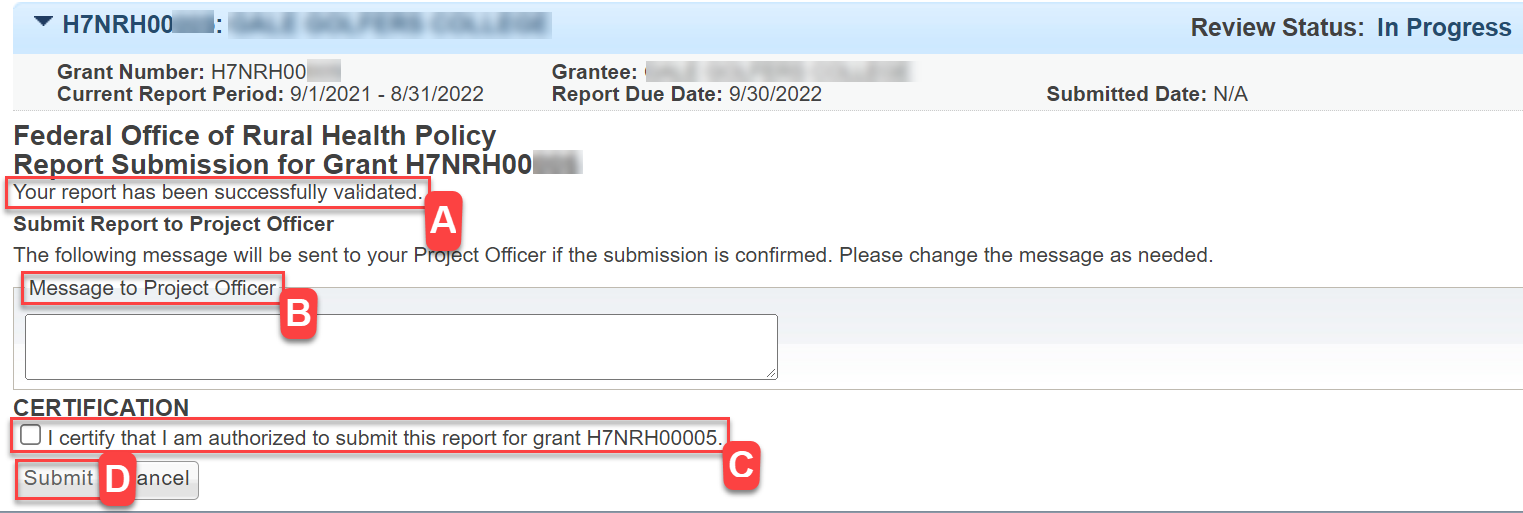
Once you have clicked Validate/Submit you will see the following: A) Submission Validation B) Message box C) Certification D) Submit button Make sure to select the Certification Box and click on the Submit button |
|
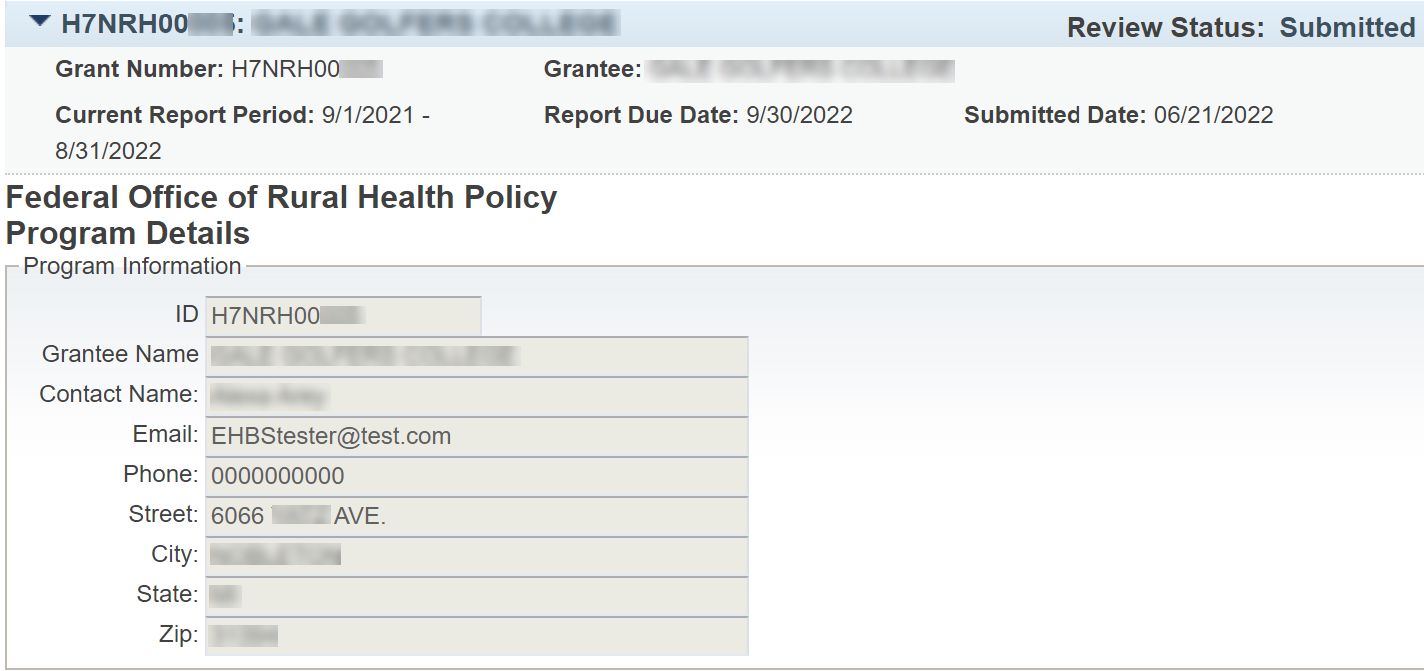
Next you will see: A) Review Status as Submitted B) Report Submitted Successfully message C) Review Report button that will allow to view a read only version of your report. |
|
Read Only version of report directly after submission. |
|
Accessing PDFs | |
|---|---|
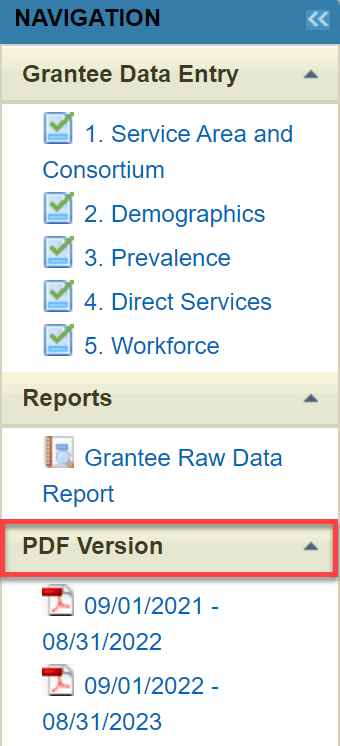
To access previous reports select the PDF related to the time period it was submitted. This is a read only version of what was submitted. The PDF can be saved and/or printed from here. CAN THE PDF BE saved and/or printed FROM HERE?? |
|
| This will be a screenshot of the PDF with save or print buttons highlighted if they exists. I don't' have access to a PDF at this time. | |
Grantee Info. | |
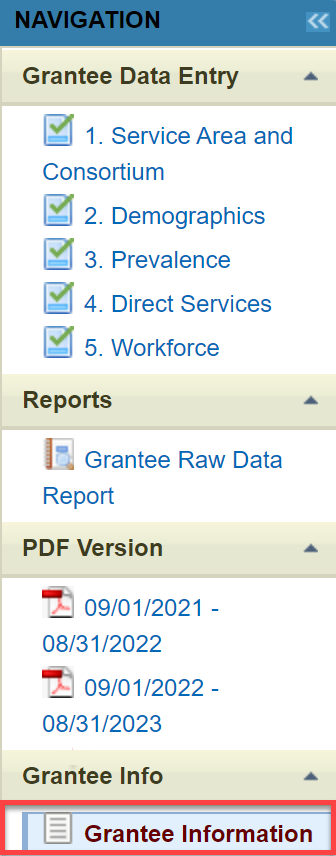
| In the Grantee Info. section click on Grantee Information to see the Grantee information page. |
|
| Grantee information page. |
|
Change Requsts | |
|---|---|

